If you want to sell digital products, courses, or memberships, getting started with Podia can save a lot of time and stress. I remember my first weeks exploring the platform. I was surprised by how much it could do and how easy it was to set up my first online course. Still, like any new tool, there’s a bit of a learning curve.
This beginner’s guide covers what you need to know to start using Podia confidently. I’ll walk through the basics, explain features in plain language, and share a few tips I wish I’d known from the start. Whether you’re hoping to turn your skills into a side hustle or grow an online business, this guide helps you get a strong foundation with Podia.
Understanding Podia: What It Does and Who It’s For
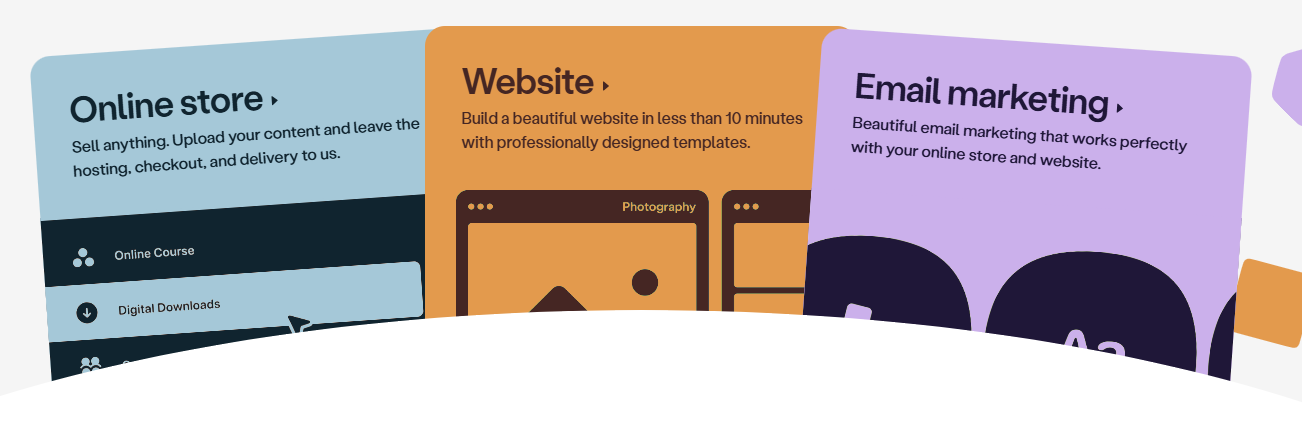
Podia is an allinone digital storefront. I use it to host and sell online courses, digital downloads, webinars, and memberships. It’s useful for creators, educators, freelancers, or business owners who want to share their knowledge or products online, but don’t want to juggle a bunch of separate tools.
Main Things You Can Do With Podia
- Sell online courses (video, audio, text)
- Offer memberships or subscriptions
- Sell ebooks, templates, and digital downloads
- Host webinars (live or prerecorded)
- Build your own website and landing pages
- Send email marketing campaigns to your audience
Podia stands out because it keeps things simple. If you’ve felt overwhelmed by complex platforms, you’ll probably appreciate the clean interface and straightforward tools.
Setting Up Your Podia Account
Starting on Podia only takes a few minutes. You can sign up for a free trial to test features before committing. I recommend exploring the dashboard first; this helps you get comfortable with where everything is.
Initial Steps:
- Sign up for an account using your email.
- Pick your business name and basic branding (colors, logo, etc.).
- Fill out your profile details. People trust a store with a clear creator identity.
- Set up your payout method so you’re ready to get paid through Stripe or PayPal.
- Walk through any onboarding tutorials Podia provides. They cover a lot for new users.
I found it helpful to fill out as much as possible before launching products. Having my branding and payment info sorted meant less to worry about later.
Choosing What to Sell: Courses, Downloads, Webinars, and More
Podia handles several types of digital products. Picking the right type depends on your audience, your expertise, and what people are willing to buy. My own first product was a PDF guide, but I later added video courses and a paid community. Here’s a rundown of the main product types:
Digital Downloads
If you have ebooks, PDFs, templates, or checklists, you can upload them for customers to buy and download instantly. This works well for bite-sized content or resources. I found that offering a package of templates helped boost initial sales because customers got more value in one transaction.
Online Courses
Podia makes it simple to structure video, audio, or text lessons into a course. You can release all lessons at once or dripfeed them over time. I often add quizzes or files to make my courses more interactive, and Podia’s course player is straightforward, so even people new to online learning can move through the material easily.
Webinars
You can host live or ondemand webinars using Podia’s integration with YouTube Live or Zoom. This is useful for coaching sessions, Q&A calls, or launches. I once ran a live masterclass and was able to offer a downloadable replay afterward, which helped drive additional sales to people who missed the live event.
Memberships
Create a membersonly area with exclusive content and community access. I use this for ongoing coaching or insider tips that I don’t share with the public. Members like having a space where they can ask questions, grab new content each month, and interact with other students or clients.
Podia lets you build a mix of these products, or focus on just one; whatever fits your style and audience. Some creators start with a single downloadable item, then expand into courses or a membership as their following grows.
Creating Your First Product in Podia
The first product setup can feel intimidating, but I found Podia’s process was pretty smooth. Each product type starts with similar basic steps and offers lots of room for creativity.
StepbyStep: Making Your First Product
- Click “Products” from your dashboard.
- Select the product type you want to create (course, download, webinar, or membership).
- Give your product a clear, descriptive title.
- Add a short description that explains the value to your customer.
- Upload your main content (videos, PDFs, links, etc.). Podia supports drag and drop, which I find quick and easy.
- Price your product. You can choose a onetime fee, payment plan, or subscription for memberships.
- Set availability (publish now, schedule, or keep as draft).
While building my first course, I uploaded videos, added a bonus PDF, and set drip releases for new lessons. I previewed the product as a customer to make sure everything looked smooth before making it public. It helps to check all links and video loads as if you were a firsttime buyer.
Designing Your Storefront and Product Pages
Podia gives you tools to create a goodlooking storefront without any coding. I like being able to customize colors, fonts, and layouts so my page feels personal and matches my brand. A strong visual design can help your products stand out and builds trust with visitors.
Tips for a Storefront That Sells
- Use highquality images or banners for each product.
- Add testimonials or social proof if you have them; a quote from a happy student can boost conversions.
- Keep product descriptions clear and focused on benefits.
- Arrange featured products to direct visitors to your best offer.
- Use Podia’s builtin sales blocks like FAQs or product highlights.
The drag and drop website editor is easy to experiment with. I often start with a template, tweak it, and preview how it looks on mobile before publishing. Having a mobilefriendly storefront is key since many buyers browse on their phones or tablets.
Setting Up Payments and Pricing
Getting paid for your work is really important. Podia connects with Stripe and PayPal for payment processing. Setting this up before your first launch keeps things smooth when people start buying. Making sure your payout options are correct prevents any delays later.
How I Set Up Payments
- Connect to Stripe or PayPal through Podia’s dashboard (the setup takes a few minutes).
- Test a purchase yourself using a lowpriced product to confirm payments flow correctly.
- Choose between onetime payments, subscriptions, payment plans, and free offers. I use a mix for different audiences. Some like paying upfront, some need monthly options.
- Doublecheck your currency settings, tax rates, and payout schedule.
If you sell internationally, Podia lets buyers pay in their local currency, which is handy for a global audience. This makes your offerings more accessible and may lead to more sales from around the world.
Integrating Email Marketing and Building Your List
Building an audience is key for consistent sales over time. Podia includes basic email marketing; no need for a separate tool when you start. I use it to collect subscriber emails, send drip campaigns, and announce launches. As your list grows, Podia lets you tag and segment subscribers based on their interests or purchase history. This is particularly helpful as you start offering new types of products or want to send targeted messaging.
Email Features I Rely On
- Newsletter signup forms to collect emails from website visitors
- Broadcast emails for launch announcements and updates
- Automated welcome emails and course sequences
- Segmentation so I can send targeted offers to the right people
When my audience was small, Podia’s builtin tools did everything I needed. Later, I connected to a dedicated email service for more advanced features, but many users never need to go beyond the basics. The ability to manage your sales and audience under one roof is a major time saver.
Marketing Your Podia Products: Tips to Get Your First Sales
Publishing a product is only the first step. Bringing in sales takes some ongoing work, but the process becomes easier with habit. I focus on a few main marketing tactics that are effective for beginners:
- Share your store and products on social media. Instagram, Facebook, X (Twitter), and LinkedIn can all bring in traffic depending on where your audience hangs out.
- Ask your early customers for reviews or testimonials. Kind words from real users help your products shine.
- Set up discounts, coupons, or limited time offers inside Podia. Running a short sale can jumpstart interest.
- Use the builtin email broadcast feature for new launches or promotions.
- Write helpful blog posts or guides connected to your product topics. Showing your expertise helps build trust and draws people into your world.
Podia also includes affiliate marketing features if you want other people to promote your products and earn a commission. I’ve used this to expand my reach. Offering affiliates a small commission helps motivate them to share my courses and resources, and you can track their performance through your dashboard.
Managing Your Customers and Delivering a Great Experience
Once sales come in, providing a professional and helpful experience keeps people coming back. I make sure to:
- Welcome new customers with an automatic email. Podia lets you trigger these easily.
- Check my dashboard for new signups, sales, and feedback.
- Respond promptly to questions in the builtin messaging system, showing that I value each student or buyer.
- Keep my products updated; adding bonus content or improvements keeps things fresh and encourages return visits.
- Use analytics to see what’s selling and where students might drop off in a course.
Customers get their content instantly after purchase, and they can always log back in to revisit their materials. This builds trust and encourages repeat sales. I also recommend following up after a few weeks to ask for feedback or testimonials.
Customizing Your Podia Site: Making It Yours
Podia gives you customization options so your storefront can reflect your personality or business brand. When I started, I kept things simple, but over time I tweaked my homepage, added custom sections, and uploaded unique images and banners.
Ways to Personalize Your Podia Site
- Upload your own logo and favicon
- Pick brand colors and fonts that match your business
- Add custom pages like About, Contact, and Resources
- Use Podia’s page builder to create landing pages for special promotions or events
You don’t need a design background to make a professional site. Podia’s templates give you a strong starting point, and small tweaks make it feel unique. You might also embed video introductions or testimonial carousels for even more personality.
Analyzing Your Results and Improving Over Time
Podia has builtin analytics, so you can check how many people visit your pages, what they’re buying, and how your email campaigns perform. I started reviewing stats each week to see which products got the most attention and where people dropped off in a course or funnel. Looking at real data, instead of just guessing, helps you make smart changes to your offers.
Metrics I Watch Closely
- Page views and conversion rates on product pages
- Email open and click rates
- Sales totals by product or promotion
- Refunds or support questions that keep coming up
Podia helps you find what’s working and what could use improvement. I use those insights to adjust pricing, update product pages, and tweak my marketing messages. Sometimes, a simple change in language or layout can boost sales significantly.
Troubleshooting and Getting Support
Almost every creator hits a snag at some point. Podia’s customer support has helped me several times. Usually, the support team provides quick and practical answers. The help center includes stepbystep guides, and live chat is available if you need a hand. For complex questions, Podia’s support staff will walk you through solutions or follow up by email.
Common Issues You Might Run Into
- Payment setup or payout timing
- Custom domain connection for your Podia site
- File size limits for uploads (Podia allows large files, but there are caps)
- Email deliverability; sometimes emails land in spam folders
- Video streaming quality (usually fixed by reuploading in a different format)
Most problems can be solved quickly, but reaching out early saves frustration down the road. I’ve found the Podia user community and Facebook groups useful for specific questions, too. Many users share their solutions and advice if you get stuck on something unusual.
Frequently Asked Questions About Getting Started
How much does Podia cost?
Podia has several pricing tiers, starting with a free plan for basic features. Paid plans offer more advanced options like memberships, additional email capabilities, and affiliate marketing. I started on the free plan and upgraded as my business grew. Full pricing is available on Podia’s official pricing page.
Can I move my existing courses or downloads to Podia?
Yes! I migrated my whole course from another platform without much trouble. Podia has import tools and support to help you bring over products and customer lists. Their documentation spells out each step, and customer support is hands-on if you need extra help during the move.
Does Podia replace my website?
If you want, Podia can be your full website. Many creators use it this way. If you already have a main site, you can link to your Podia storefront or embed buy buttons on your other pages. I used both approaches over time; some users keep a blog on their main site and run all sales through Podia.
Do I need any technical skills?
No coding or design skills are required. Podia is made for beginners and includes stepbystep help for everything. I’d never built an online course before Podia, but I got my first one launched in a weekend. The interface guides you along, so you can focus on your content rather than tech hurdles.
My Tips for Beginners: Getting the Most From Podia
- Start with a single simple product to learn the ropes, then expand later. You’ll build confidence with each new launch.
- Use builtin product previews to see exactly what customers will experience. This helps you catch mistakes before going live.
- Test your checkout. Buy your own product with a discount to make sure the process feels smooth and easy for users.
- Ask for feedback from a friend or early customer before a big launch. Fresh eyes spot things you might miss.
- Check out Podia’s official guides and live workshops for inspiration; there’s always something new to learn, and Podia’s blog is packed with practical advice.
Podia grows with you. Whether you’re sharing a hobby, teaching a course, or running a small business, getting the basics in place gives you space to experiment and improve over time. Don’t stress about making everything perfect right away; progress is more important than perfection.
Your Action Plan for Getting Started
- Create your Podia account and set up your profile and branding.
- Pick one product idea and build it using Podia’s tools.
- Set up payments and test a purchase to make sure everything works smoothly.
- Customize your storefront and add a signup form to collect emails. Growing your audience from day one pays off later.
- Share your store with friends and online communities to bring in your first sales. Don’t be afraid to promote what you’re offering; people can’t buy what they don’t know about.
Everyone’s adventure on Podia will look a little different, but getting started is the most important step. If you’re ready to turn your knowledge into income, Podia gives you the tools to make it happen. Take it one step at a time and watch your online business grow.