GetResponse Tutorial: A Complete Guide For Beginners
If you’re starting to build an email list, launch your first marketing campaign, or want to automate more of your business, GetResponse can help you get things moving. I remember how confusing email platforms felt when I first started, so I wrote this step-by-step GetResponse tutorial to make things easier for beginners. After using different email marketing tools and exploring GetResponse for myself, I’ve learned where to start, what works, and how you can get the most out of their features right from the start.
If you feel overwhelmed by all the email, automation, and funnel possibilities, you’re not alone. With a little patience and guidance, you’ll be managing your own lists, sending beautiful emails, and tracking your results confidently. This guide will help you set up and use GetResponse whether you’re just testing it out or want to start your first real campaign.
What is GetResponse and Who is it For?
GetResponse is an online marketing platform mostly known for email marketing, landing pages, marketing automation, and webinar hosting. I use it mainly for email marketing, but plenty of people like it for building sales funnels, automating follow-ups, and even collecting leads for webinars.
If you’re a blogger, small business owner, freelancer, or digital product seller, GetResponse gives you a bunch of tools in one place. It’s designed for people who want to grow an audience, sell products, or nurture leads without needing a ton of technical experience. While larger companies use it too, I think beginners will appreciate how easy it is to get started with templates and drag and drop tools.
One aspect that sets GetResponse apart from other email marketing platforms is its all-in-one offering. You don’t have to juggle multiple services or patch together various plugins. Instead, you get emails, landing pages, webinars, and automation in one convenient dashboard. This makes it easy to focus more on content and less on tech headaches. Plus, if you ever want to expand your marketing efforts in the future, you don’t need to switch tools or migrate your list.
Creating Your GetResponse Account
Sign Up For a Free Trial
You can try GetResponse with a free trial and no credit card required, which I always find helpful. Just visit the GetResponse website, enter your email, and follow the instructions to activate your account. You’ll get access to the core features during the trial, so it’s a good chance to see what works for you.
Complete Your Account Profile
- After confirming your email, log in for the first time.
- Fill out your profile, including your business name, address, and website if you have one. This information is important because it’s used in your email footers to follow best practices and compliance rules.
Setting Up Your First Email List
Why Lists Matter
Every email you send in GetResponse must go to a list. Lists are where you keep your subscribers organized by interest, stage, or project. I like to create a new list for each new topic or funnel so I can track what subscribers signed up for.
How to Create a List
- Click the Lists tab in your dashboard.
- Choose Create List and give it a descriptive name. For example, “YogaNewsletter2024.”
- Save your list. You can edit its settings later, such as adding a description or setting up GDPR fields if you’re in Europe.
If you already have subscribers from elsewhere, you can import them using a .csv file or by pasting emails manually, but make sure you have their permission.
Keeping your lists tidy helps maintain good deliverability and makes your campaigns much more effective. If you get in the habit of using different lists for different segments and interests now, you’ll save yourself time and confusion as your audience grows.
Designing Simple Signup Forms to Grow Your List
How Signup Forms Work
The main way people join your list is through a form. GetResponse offers templates and a drag and drop form builder, so you don’t need design or coding skills. I suggest starting with an inline form or a popup, depending on your website setup.
You can customize signup forms with your own branding, colors, and images to make them fit your site. For example, you can add your logo, change pretty much any color, and add custom fields if you want to collect more information than just a name and email.
Steps to Create Your First Form
- Go to Forms & Surveys and click Create Form.
- Pick a template or start from scratch if you want something simple.
- Edit the fields, such as name and email, and update the headline if needed.
- Set which list the form will add subscribers to. Double check this!
- Click Save and Publish for options to embed the form on your site, generate a link, or share on social media.
Once you’ve set up your form, test it yourself with a different email address to make sure everything works smoothly. Also, try viewing the form on a mobile device for a quick check, since more people sign up from their phones now than ever before.
Sending Your First Email Campaign
Basics of an Email Campaign
An email campaign is a message you write and send to people on your list. This could be a welcome note, newsletter, promo, or product update. GetResponse calls these “Newsletters” or “Email Campaigns.”
Email marketing works best when you send messages with a clear purpose, so spend a minute thinking about what you want your emails to achieve. Are you sharing tips, announcing a sale, or inviting people to an event? Spell it out before you start editing your email.
Writing and Scheduling an Email
- Click Email Marketing and choose Create Newsletter.
- Name your campaign for your own reference (subscribers won’t see this name).
- Choose the list you want to send it to.
- Pick a template or use the drag and drop builder for a custom email. Keep it simple as you learn.
- Write your subject line. Clear, honest subject lines work best in my experience.
- Edit the email content. You can drag in images, text, buttons, and dividers. Personalize with the subscriber’s name for more involvement.
- Preview how your email will look on desktop and mobile.
- Send a test email to yourself to spot typos or formatting issues.
- Schedule the email to go out right away or pick a date and time for later.
Tips for Your First Email
- Welcome new subscribers and remind them why they signed up.
- Deliver any promised lead magnet or free resource.
- Keep your message short and add a clear call to action.
Take advantage of personalization features. Even something as simple as greeting your subscribers by their first name can boost open and click rates. Also, consider segmenting your list if you have different groups, so everyone receives info they care about most.
Understanding Autoresponders and Marketing Automation
What Is an Autoresponder?
An autoresponder is an email or series of emails sent automatically after someone joins your list or completes an action. I use autoresponders to welcome new subscribers and deliver mini courses. You can set the timing for each message, like sending one right away, then another two days later.
Autoresponders take the pressure off having to manually send emails each time someone joins. These can be simple (one or two welcome emails) or more detailed, like weekly lesson series or product onboarding flows. Set up your autoresponders once, and they’ll run in the background for every new subscriber.
How to Set Up an Autoresponder
- Click Autoresponders from the menu and then Create Autoresponder.
- Name your autoresponder and choose the list it applies to.
- Choose when it will send (immediately, after one day, etc.).
- Design your email as you would a standard campaign.
- Save and activate the autoresponder.
Going Further With Automation Workflows
GetResponse also has visual automation workflows if you want to get more advanced. You can trigger emails based on subscriber actions, such as clicking a link, joining a list, or visiting a specific page.
- Start with something simple, like sending a thank you email after a form submission.
- Drag and drop actions, conditions, and filters in the workflow editor.
You can build more complex paths later on, such as tagging subscribers based on interests or sending unique offers to people who’ve clicked a specific link. These tools are surprisingly easy to use and can give a big boost to your engagement if you take the time to experiment.
Test your automation regularly and watch the reports to improve open rates and click rates. If something isn’t working, adjust the messaging or timing and run another test.
Creating Landing Pages to Capture More Leads
Why Use Landing Pages?
When I want to promote a lead magnet or test a new offer, I use GetResponse landing pages. These are standalone pages that focus on one goal, usually getting the visitor’s email address. Landing pages are helpful if you don’t have a website yet or want a distraction free signup experience.
You can also use landing pages to experiment with offers or messages without having to edit your main website. By splitting your traffic between different landing pages, you can figure out what draws the most signups or sales. This is vital if you’re planning paid ads or launching something new.
Steps to Build a Landing Page
- Click Landing Pages and then Create Landing Page.
- Choose a template or start fresh. Templates make it faster for beginners.
- Add your headline, subheadline, visuals, form fields, and signup button.
- Connect the landing page form to the right list for automatic subscriber capture.
- Set up the thank you page or redirect after signup.
- Publish the landing page and share the link anywhere you like.
Be sure to include the benefits of joining your list and keep the signup form and call to action clear. Use contrasting colors for your signup button so it stands out, and add social proof if possible, like testimonials, to give people more confidence.
Using Basic Analytics to Improve Your Results
What to Track
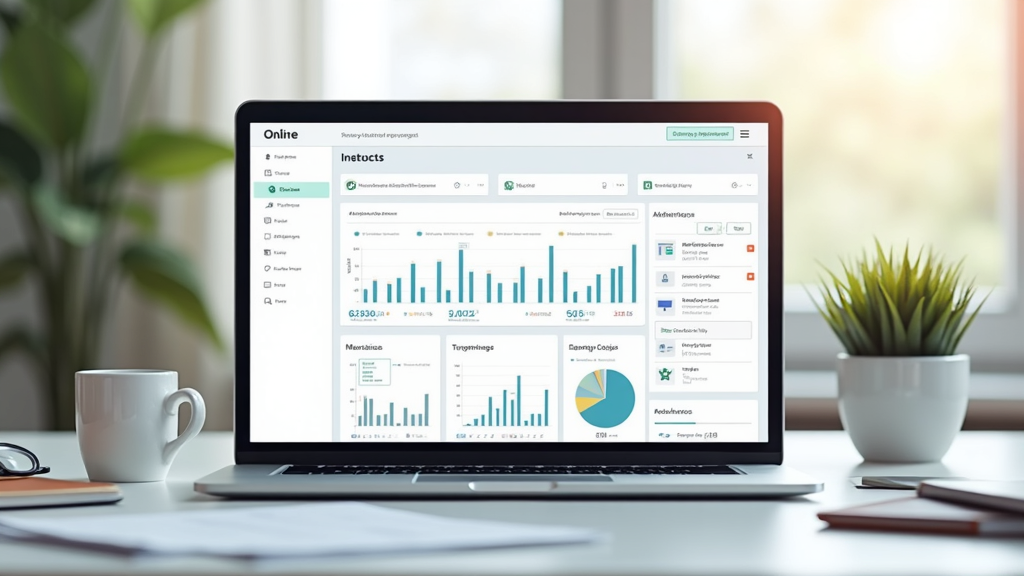
When I send out my first emails, I always check the basic stats: open rates, click rates, unsubscribes, and bounces. These tell me if people are getting involved or if something needs tweaking. GetResponse has a simple analytics dashboard you can check for each campaign.
You might also want to track how many people are signing up each week or month, the performance of signup forms, and which lead magnets are most popular. The more you check these numbers, the easier it becomes to spot trends and adjust your tactics for better growth.
How to Interpret Your Reports
- Open Rate: The percentage of recipients who opened your email. Higher open rates usually mean your subject line and timing are working well.
- Click Rate: The percentage who clicked a link. If this is low, try improving your call to action or making your emails more visually appealing.
- Unsubscribes: If people leave your list quickly, check if your message matched their expectations and if you’re emailing too often.
Checking analytics at least once a week helps you spot issues before they get big and improve your emails for more involvement. You can create notes on what changes you’ve made and the effect, building a history of what works best for your audience.
Using Segmentation for More Targeted Emails
What is Segmentation?
Segmentation is when you divide your email list into smaller groups based on things like interests, previous actions, or signup date. For example, I can send a welcome offer just to new subscribers or monthly updates to my most active readers. This leads to better results because people get emails they care about.
Targeted emails lead to higher opens and clicks, and fewer unsubscribes, because you aren’t blasting everyone with the same message. As your list grows, paying attention to segmentation becomes one of the biggest ways to improve conversions and keep your subscribers happy.
Simple Ways to Segment in GetResponse
- Label contacts by source (newsletter opt in, purchase, webinar signup).
- Use tags to organize subscribers after they take an action (click, buy, download).
- Create segments for hottest leads or most recently active subscribers.
Start simple, then get more detailed as your list grows and you learn more about your audience. Over time, you can offer different content depending on whether someone opened the last few emails, made a purchase, or clicked on a specific topic. This personal touch makes a big difference in loyalty and sales.
Common Beginner Questions and Quick Troubleshooting
Why Aren’t My Emails Showing Up?
- Check your send settings and make sure your list has confirmed subscribers.
- Look in your spam or promotions folder. Email authentication issues, like missing DKIM or SPF records, also cause delivery problems.
How Do I Avoid the Spam Folder?
- Don’t use misleading subject lines.
- Always get permission before emailing.
- Include your physical business address in every email.
- Keep your list clean and remove inactive subscribers occasionally.
Can I Import an Existing List?
Yes, but GetResponse requires that every subscriber has opted in. During import, you’ll need to confirm how you got the emails, and GetResponse may check in for proof if there are complaints.
How Many Emails Can I Send on a Free Plan?
The GetResponse free trial has some limits on sends and features. You can check the current plan details on their website as these may change over time. It’s best to read the fine print before you fully launch your campaigns so you don’t accidentally hit a limit.
If you’re unsure about any setup step, you can use GetResponse’s help center, support chat, or look for video guides to walk you through each task with visuals. Their support is responsive and helpful even if you’re completely new to email marketing.
My Actionable Checklist for Getting Started with GetResponse
- Sign up for a free trial and complete your account setup.
- Create your first list and design a simple signup form.
- Place the form on your website or share the landing page link.
- Write a short welcome email and send it to yourself for testing.
- Set up an autoresponder to welcome new subscribers automatically.
- Check your statistics after every send to learn what’s working.
- Experiment with simple segmentation as your list grows.
- Adjust your emails based on open and click data. Try different subject lines, layouts, or times of day for sending.
- Join GetResponse webinars or read their tips blog for new feature updates and best practices. The more you learn, the more powerful your marketing can become.
I found starting small and taking it one feature at a time helped prevent overwhelm. Each time you try something new, check reports and tweak your approach as needed. With consistent effort, GetResponse can become one of your most valuable business tools for growing an audience and building trust over time. Remember, the key is to keep learning, experiment regularly, and don’t be afraid to reach out for help when needed; you’ll gain confidence and skill with every step forward.


